Pages

Wednesday, July 31, 2013

Dehydrating! Marinated Sundried Tomatoes

Last summer when I was going through some of my Dad's things in Minnesota I came across his huge dehydrator. I brought it home, thinking I could sell it because I just didn't have room for it in my house. Well, once home, I had a hard time parting with it. I thought maybe I could use it to dry all the fresh herbs I was going to be making. So it has sat in the basement for quite some time. Well, if anything is growing like crazy in our garden, it is the tomatoes. After making soup, using them for sandwiches and salsa, I had to think of another way to use them up. Enter the dehydrator! I had visions of yummy marinated sun-dried tomatoes in my mind. So I got the thing up, cleaned it out, and got to slicing up my tomatoes.

I am SO so glad I kept the thing. It was a cinch to use, and my results - fantastic. I just had to layer the tomatoes in grates, and turn it on. I had mine on for about 9 hours. I had also put in some apples because that is another thing I bought way too much of at the orchard last week. These also came out super good. It is going to be the perfect car snack for my long trip up North this weekend.

So now I am a little addicted. I keep looking through my house looking for things to dehydrate. I have some more apples going right now, and a banana just to see how that turns out.

As for my sundried tomatoes - they are marinating in some extra virgin olive oil, red wine vinegar, some herbs, and salt and pepper. I am so excited to use them either on pizza, in pesto, or just out of the jar and put on some crusty bread. Then I get to use that infused olive oil mixture for whatever I want. What a beautiful thing!

My apples and tomatoes - lots more tomatoes in the under layers!

I love the stars inside of apples. I used my pastry tip to cut them out of the apples

The massive dehydrator - totally worth the space


Mmmmm snackies!

They are a little brown, but they taste great and I don't mind it. Some lemon juice might solve that. 

Some tomatoes in my olive oil mixture. Oh. So. Good. 


Next up: apples and bananas cookin' right now
Sundried Tomatoes in Marinade

About 1 cup sundried (dehydrated) tomatoes, enough to fill jar UN-packed
Extra Virgin Olive Oil
Red Wine vinegar
1/2 tsp each dried oregano, basil, rosemary, parsley and salt
pepper

Place all ingredients in a jar - filling it about 3/4 the way with the olive oil and the rest of the way with vinegar along with the herbs. Let sit in the fridge to marinate. Enjoy in every way possible.

Wednesday, July 24, 2013

The Best Pizza Yet

Who doesn't LOVE pizza? If you don't, you are lying. Seriously, stop trying to pretend you are better than everybody else. There is nothing to not like. My Mom always made homemade pizzas. I didn't even eat a pizza she didn't make until I was probably 9 or 10, and even then, we would beg for homemade. My Mom's pizza is still the epitome of how homemade is always best. Whether you like it thin 'n crispy, doughy with lots of cheese, or with a foccacia crust with just a drizzle of olive oil and toppings - there is something for every one.

And this is mine. I do love all sorts of pizza. The only pizza I don't like is when the crust is so thin it is like a cracker, or there isn't a lot of flavor. This pizza just puts together everything I love not only about pizza, but about food in general. Fresh ingredients, awesome flavor combos, local produce/cheese, and something a little different and exciting.

The pizza crust I use comes from the Pioneer Woman. I bought her cookbook a few years ago before I had any idea who she was - and now she has her own TV show. Figures, she has some awesome recipes! I do use whole wheat pastry flour though. Here is a link to her crust. Then when I roll it out or stretch it out in the pan, I use a whole lot of cornmeal. I like working the cornmeal in to the crust as well as using it as a non-stick element. It gives the pizza a great crunch!

My sauce was simple - just a little olive oil. I do love red sauce, but there was so much going on here, there wasn't really room. Over the olive oil I sprinkled some asiago cheese. On top of that, I put some grilled zucchini. By the way, this whole pizza is cooked on the grill. I had never done that before, and it came out awesome. Being it is so hot out I was glad not to turn on my oven! So, I grilled the zucchini first, and then put the pizzas on after they were all assembled. After the zucchini went on, I put the whole thing on the grill. Tip: chose a cookie sheet or pan that fits on your grill - make sure it fits. This is something I would normally forget, so I was pretty proud of myself for checking first.


The pizza cooked on the grill for about 10 minutes, and then I put the rest of my prepared toppings on. I don't have a lot of pictures because I really didn't think I'd write a post about this pizza, but after it was made, I just had to share it. I had a bunch of fresh herbs, including basil and parsley, that I chopped up. Then I had some garden fresh tomatoes that I chopped and drizzled with some balsamic vinegar. So these things went on the pizza for just a few minutes along with some local goat cheese. I wanted them to warm up a bit but not wilt. So after those stayed on a couple minutes, the pizza was done!


It had a nice chewy dough with crispy crust, delicious fresh produce, and a great creamy cheese on top. It just doesn't get any better.


There really is no recipe for this. You just have to make what you love. Use what you have. Be different and fun. Enjoy!

Tuesday, July 23, 2013

Lactation Cookies

Don't let the title of this post scare you! These aren't just for breastfeeding mothers. However, if you are a breastfeeding mother, or plan to be one, this is a good recipe to have on hand! You can buy good lactation cookies but they are so expensive. They are much more affordable this way and of course, the more you make home-made the better. 

The 3 key ingredients that help with milk supply in these cookies are brewers yeast, oats, and flax meal. I ordered my flax meal and brewers yeast from Amazon, as I do everything else. Now, I have no problems with my supply for baby girl. These cookies are also good for just general nutrition and nutrition of the milk I am making. Plus they taste good and make an excellent on-the-go breakfast or afternoon snack. If you aren't a lactating mother, you can probably skip the brewers yeast. Unless you like that flavor - which really, I do. 

I like that this recipe uses maple sugar for the slight sweetness, and coconut oil for the fat. Also, I would not skip the chocolate chips. Without them, these cookies would be really un-sweet and the yeast would overpower everything. I might also add raisins and some nuts next time, or dried blueberries. But I would never leave out some extra addition. 

I'd also like to take this chance to talk about cinnamon. I recently ordered some REAL Ceylon Cinnamon off amazon and when I got it, I knew for certain that the stuff I was getting at the store is not real cinnamon, but it's cheap alternative cassia. The main difference I find between the two is the Ceylon cinnamon is much less harsh and doesn't have that "burn your mouth" feeling. It smells a little different, which is how I knew I now had the real stuff. If things like this are important to you like they are to me (cinnamon has many healing and nutritional properties that I want and can't get from cassia) you should check your source for cinnamon!


Grinding some oats up in the food processor

Adding it to whole oats, flax meal, tapioca starch, brewers yeast, baking soda, baking powder, and cinnamon

And chocolate chips....for the antioxidants! Then coconut oil and maple syrup

The dough

The nutritional powerhouses

I like to make bog cookies!

Mmmm so good!
Lactation Cookies, adapted from Cara's Cravings

1 1/2 cups rolled oats
1/2 cup flax meal
1/4 cup tapioca starch
4 heaping tablespoons brewers yeast (optional for non-milk makers)
1 tsp cinnamon
1 tsp baking soda
1/2 tsp baking powder
1/2 tsp salt
2/3 cup chocolate chips
1/4 cup extra virgin coconut oil
2/3 cup maple syrup

Preheat oven to 350 degrees. Line cookie sheets with parchment or a silpat.
Blend 1/2 cup oats in food processor until it reaches a flour-like consistency.
Mix with the rest of the oats, flax meal, tapioca starch, brewers yeast, cinnamon, baking soda, baking powder, and salt. Add chocolate chips. Then stir in the coconut oil and maple syrup. I used about 1/4 cup of dough per cookie and got 14 cookies out of the deal. Place on cookie sheets and bake for about 15 minutes.

Tuesday, July 16, 2013

Zucchini Bread

Its that time of year again. The time when gardens are flourishing with food. We've had our ups and downs with our garden (apparently root vegetables don't grow very well in clay), but some things that have survived are the lettuces, tomatoes, and squashes! And I think the corn. We'll give it some more time and see.

We not only have summer squash coming out of our garden, but we get it from others too. People seem to always be looking to get rid of some zucchini, because it grows so much and they get overwhelmed. Well, I welcome the onslaught of zucchini. I have two handfuls of recipes to use them up. From side dishes to casseroles to appetizers to desserts - I WILL use all of this squash. Starting with zucchini bread. Because it is so good and to me, is one of the best parts about the summer harvest. Slathered with good butter, maybe toasted in the oven - it makes the perfect breakfast or snack.

Especially this recipe. This recipe is super healthy, but it still moist and almost decadent. It is originally from Simply Whole Kitchen.

Almost all of my ingredients. 
My boy likes to supervise

And help stir

Baby girl is taste testing the zucchini for me

All mixed up and in the pan
I actually stole this picture from Simply Whole Kitchen, because I forgot to take a picture of my loaf. It looks just like this though. I have slices frozen in my freezer and will take my own picture ASAP!
 Zucchini Bread

3 c whole wheat white flour
1 tbsp cinnamon
1/4 tsp nutmeg
1 1/2 tsp baking soda
1/4 tsp baking powder
1/2 tsp salt
2 eggs
3/4 c coconut oil (or butter)
1/2 c whole milk
1 tsp vanilla
3 c grated zucchini (about 2 medium zucchini or one XL)
1 c chopped pecans


Preheat your oven to 325 degrees. Combine all of your dry ingredients in one bowl and all of your wet in another (except for the zucchini and nuts).  Form a well in the center of the dry ingredients.  Add the wet ingredients and stir to combine (don't over mix).  Add the grated zucchini and nuts and stir to combine.   Pour the dough into a greased loaf pan and bake at 325 for 35-40 minutes.


Monday, July 15, 2013

Teething Biscuits

Baby girl is on a roll with this baby-led weaning thing. She started out with sticks of avocado, soft sweet potato, and greens beans and is now eating these things plus scrambled eggs, melon, bananas, cheerios, and another soft food she can get her hands on.

She also got her first tooth just before she turned 7 months old, and is working on another one that I am expecting any minute. She ALWAYS wants to be chewing on something. She loves the teethers you can put in the freezer, but they warm up so fast. She likes chewing on food, but that goes pretty quick too since they are easy to gum up and get down. I knew she would love some sort of teething biscuit that she could gnaw on for a long time. She also likes things that are big for easy grabbing, such as a whole half of a banana or eggs in a long stick form.

They make cracker-like biscuits just for this purpose, such as these by Earth's Best. It isn't so much the ingredients that bother me (besides the dried milk and just the fact that they are made in a factory), but the price and and texture. They are really crunchy, and I fear that a big chunk would break off and my little angel wouldn't be able to gum it up in time and she might choke. They are great for older toddlers when you need something packaged and on-the-go, and I did use these for my boy when he was a little over a year, but I wanted something else for my 7-month-old. Something hard, but not brittle, and nutritious too.

I had no idea these would come out as good as they did. I was kind of blindly throwing darts at the board and happened to come up with a fantastic baby-led weaning recipe. They are so perfect for her - she can grab them easily, they take her forever to get soft enough to get a little bit in her mouth, and she loves the taste. They keep her busy, her gums happy, and she gets a nutritious snack if she gets any down.

I used jarred sweet potato baby food here, but I'd rather use fresh mashed sweet potato. I just happened to have the jarred stuff and didn't' want it to go to waste.

I also used baby cereal. I read the ingredients several times, and deemed it legit. There are added vitamins, which I'm not sure how I feel about, but given my certain tendency to be anemic I figured it couldn't hurt her to have a little extra iron source.

My ingredients: whole wheat flour, baby cereal, banana, sweet potatoes, butter, and maple syrup.


I started by mashing half the banana and sweet potato together. If you want to skip the sweet potato, I'd just use a whole banana. Alli likes half of bananas though, so it worked out nicely. 


Nothing like baby mash. 


Then I added the melted butter. A lot of other teething biscuit recipes are fat free. Not in this house. 


Then I added the flour, baking powder, and cereal and got it all mixed up. 


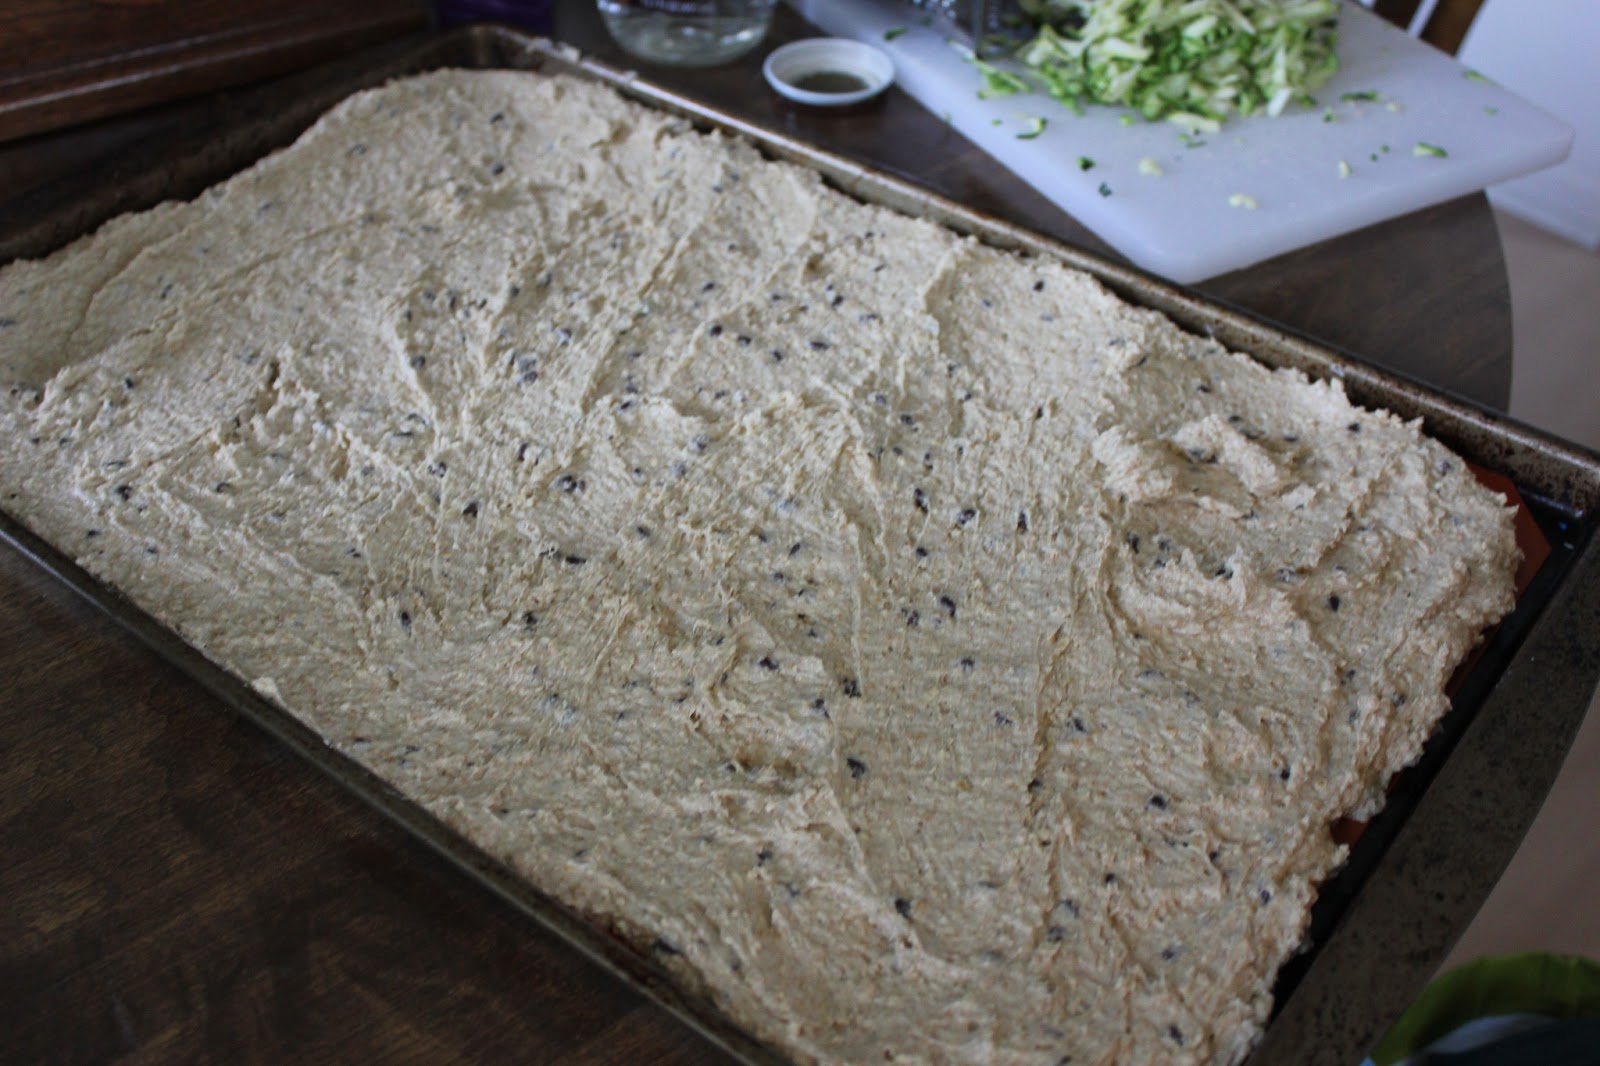
I took half the dough and rolled it out in more baby cereal. I worked quite a bit of cereal into it. 


I rolled it out cracker-thin, and then used cookie cutters to accomplish this. A donut cutter would work well too. This also gave me adorable little heart-shaped crackers suitable for my toddler. 


Baked!


Aren't they cute?


Baby girl loves them. They are just slightly sweet, and very wholesome tasting. My toddler likes them too - so win win!!


Lovin' it! They do get kind of messy because they become complete mush, but, don't all things at 7 months?


These are also so much better than those awful puff deals. 

Teething Biscuits

1/2 a banana
1 jar baby sweet potatoes, or an equal amount of mashed sweet potatoes. 
4 Tblsp. butter
1/4 cup maple syrup
1 cup whole wheat flour
1 cup baby cereal
1/2 tsp. baking powder

Mash the banana and sweet potatoes together. Add in the butter and maple syrup. Then stir in the flour, cereal, and baking powder. Separate dough into 2 portions and roll out pretty thinly - a little thinner than a graham cracker. Cut out into desired shapes and put on a baking sheet lined with either parchment or a sil-pad. Bake at 350 degrees until browned slightly - about 15 minutes. Let cool and store in air tight container. I packaged mine good and freezed most, so I can take them out as I need them. I didn't want them sitting around going bad given she eats about 1 every 3 days :). 


Wednesday, July 10, 2013

The Best Venison Marinade

Do I ever love venison. I grew up on it, coming from a hunting family. I have fond memories of helping my Dad strip the hide of deer hanging in our garage. However, my memories of venison aren't that great. The best way I had it as a child was probably in stews or dishes such as venison stroganoff where the mean is cooked to death so that you can chew it. Try to grill a steak as though you are cooking a beef sirloin is going to get you a really tough piece of meat.

Don't get me wrong - I love venison that is cooked to death, especially in chili!

I like to encourage people to eat wild game. In my opinion, hunting is a far more humane way to acquire and eat another animal. It is respectful to the animal, and better for the person consuming it. I must know where my meat comes from, always. It is so important.

Venison is very lean, so it needs tenderizing to break it down and make it melt in your mouth. That is what this marinade does. It not only makes the meat nice and tender, but it give it such a great flavor. It has a very authentic German taste and goes amazing with red cabbage and spaetzle. It is my absolute favorite and I rarely stray from it. In fact, it has been a secret until now. My husband doesn't even know what I put in it. However, I want you all to get out there and not be afraid to try venison steaks. Especially leg steaks and chops. If you can get a tenderloin cut, you are in for a real treat, but to use the rest of the deer, this is for you.

My ingredients

All mixed up

On the grill after 24 hours

Resting

Absolutely perfect


I served my steaks with parmesan-baked zucchini and lemon orzo. Not a speck was left on anybodies plate.

The Perfect Venison Marinade

1 cup apple cider vinegar
1 cup red wine
1/2 cup peanut oil (or other oil)
1 Tbsp. oregano
2 cloves crushed garlic
1 tsp. salt
1 tsp pepper (smoked pepper if you have it)
Water to cover
4 venison leg steaks

* You can adjust this recipe to fit however much venison you are making.

Place venison in a container with a lid. Add all your ingredients and then fill the rest of the way with water. Close the lid and shake, shake, shake!! Let sit in the refrigerator overnight, or even better a whole day. Even better, 2 nights. Take venison right out of marinade and place on your grill and cook for about 8-10 minutes on each side depending on how thick your steaks are. Mine were really thick. You do NOT want to over cook these. You want a little pink in the middle.

"Clean" Chocolate Chip Cookies

For out family's 4th of July celebration, I was to bring a dessert. I debated whether I wanted to bring a healthy dessert or just a good old sweet treat for everybody to enjoy. So I decided to go with both. I had seen a picture for these cute little star cookies where you use strawberries and blueberries to decorate them. Here is the picture I'm referring to:


Great idea, right? Well, let me tell you. First of all, strawberries are not all uniform in size and shape. I had so many issues trying to cut them to get that nice star shape. They were also way too big for my cookie, so I had to trim them. Every single slice. For all the cookies. Waaayyyyy too much trouble. So after I went to all this trouble, they still didn't look great, and I had to figure out how to package them to get them to the party. Clearly, they don't exactly stack. So I came up with this wax paper layering thing that kind of worked, but still wasn't great. So my warning to you is - it isn't as easy as it looks. I could have done a dozen other things with my time than make these cookies. 

Anyway! What I did like was the chocolate chip cookie recipe I came up with to make the base. These are my healthy chocolate chip cookies, and they really hit the spot. I'll definitely make them again, sans decorations. I also made a batch of sugar cookies and did the same thing to bring to the party. 

My ingredients for the chocolate chip cookies are all good for you. They are a perfect dessert for my toddler, especially since they aren't as sweet as most other cookies. They were good topped with cream cheese and fruit, but I liked them just as is. 


I used ground oats and whole wheat pastry flour to get that whole grain goodness but still trying to keep it light  and soft. Also, local honey for the sweetener

Butter. Not a traditional "clean" ingredient but it is in this house. I've said it before and I'll say it again. Once you do your research, you find that butter is indeed a healthy fat. 

I used mini chocolate chips because I thought it would make them easier to cut into shapes once baked, but in the future I will use chunks for sure.

I like to bake cookies in sheet form, so I get doughy-er cookies. 

Here they are baked

The boy loves helping!
I forgot to take pictures of my cut out cookies. I cut them out after they were baked. After all the time I put in making them, I just didn't have time for anything else. That isn't important though. This is a good, healthy recipe for chocolate cookies - I'd even eat them for breakfast!

Chocolate chip cookies

2 sticks butter, softened
3/4 cup honey
1 egg
1 tsp vanilla
1 cup whole wheat flour
1 cup old fashioned oats, ground to a flour in processor
1 tsp baking powder
1 tsp. cornstarch
1 cup mini chocolate chips

Preheat oven to 350. In mixer, blend butter and honey until well combined. Add egg and vanilla. Then add the dry ingredients. Last, blend in the chocolate chips. Spread out on cookie sheet that has either been greased or fitted with a silicone pad. Bake in the oven for about 15 minutes, or until just set (just barely getting some color on the edges. Let cool and cut!