Pages

Monday, July 15, 2013

Teething Biscuits

Baby girl is on a roll with this baby-led weaning thing. She started out with sticks of avocado, soft sweet potato, and greens beans and is now eating these things plus scrambled eggs, melon, bananas, cheerios, and another soft food she can get her hands on.

She also got her first tooth just before she turned 7 months old, and is working on another one that I am expecting any minute. She ALWAYS wants to be chewing on something. She loves the teethers you can put in the freezer, but they warm up so fast. She likes chewing on food, but that goes pretty quick too since they are easy to gum up and get down. I knew she would love some sort of teething biscuit that she could gnaw on for a long time. She also likes things that are big for easy grabbing, such as a whole half of a banana or eggs in a long stick form.

They make cracker-like biscuits just for this purpose, such as these by Earth's Best. It isn't so much the ingredients that bother me (besides the dried milk and just the fact that they are made in a factory), but the price and and texture. They are really crunchy, and I fear that a big chunk would break off and my little angel wouldn't be able to gum it up in time and she might choke. They are great for older toddlers when you need something packaged and on-the-go, and I did use these for my boy when he was a little over a year, but I wanted something else for my 7-month-old. Something hard, but not brittle, and nutritious too.

I had no idea these would come out as good as they did. I was kind of blindly throwing darts at the board and happened to come up with a fantastic baby-led weaning recipe. They are so perfect for her - she can grab them easily, they take her forever to get soft enough to get a little bit in her mouth, and she loves the taste. They keep her busy, her gums happy, and she gets a nutritious snack if she gets any down.

I used jarred sweet potato baby food here, but I'd rather use fresh mashed sweet potato. I just happened to have the jarred stuff and didn't' want it to go to waste.

I also used baby cereal. I read the ingredients several times, and deemed it legit. There are added vitamins, which I'm not sure how I feel about, but given my certain tendency to be anemic I figured it couldn't hurt her to have a little extra iron source.

My ingredients: whole wheat flour, baby cereal, banana, sweet potatoes, butter, and maple syrup.


I started by mashing half the banana and sweet potato together. If you want to skip the sweet potato, I'd just use a whole banana. Alli likes half of bananas though, so it worked out nicely. 


Nothing like baby mash. 


Then I added the melted butter. A lot of other teething biscuit recipes are fat free. Not in this house. 


Then I added the flour, baking powder, and cereal and got it all mixed up. 


I took half the dough and rolled it out in more baby cereal. I worked quite a bit of cereal into it. 


I rolled it out cracker-thin, and then used cookie cutters to accomplish this. A donut cutter would work well too. This also gave me adorable little heart-shaped crackers suitable for my toddler. 


Baked!


Aren't they cute?


Baby girl loves them. They are just slightly sweet, and very wholesome tasting. My toddler likes them too - so win win!!


Lovin' it! They do get kind of messy because they become complete mush, but, don't all things at 7 months?


These are also so much better than those awful puff deals. 

Teething Biscuits

1/2 a banana
1 jar baby sweet potatoes, or an equal amount of mashed sweet potatoes. 
4 Tblsp. butter
1/4 cup maple syrup
1 cup whole wheat flour
1 cup baby cereal
1/2 tsp. baking powder

Mash the banana and sweet potatoes together. Add in the butter and maple syrup. Then stir in the flour, cereal, and baking powder. Separate dough into 2 portions and roll out pretty thinly - a little thinner than a graham cracker. Cut out into desired shapes and put on a baking sheet lined with either parchment or a sil-pad. Bake at 350 degrees until browned slightly - about 15 minutes. Let cool and store in air tight container. I packaged mine good and freezed most, so I can take them out as I need them. I didn't want them sitting around going bad given she eats about 1 every 3 days :). 


Wednesday, July 10, 2013

The Best Venison Marinade

Do I ever love venison. I grew up on it, coming from a hunting family. I have fond memories of helping my Dad strip the hide of deer hanging in our garage. However, my memories of venison aren't that great. The best way I had it as a child was probably in stews or dishes such as venison stroganoff where the mean is cooked to death so that you can chew it. Try to grill a steak as though you are cooking a beef sirloin is going to get you a really tough piece of meat.

Don't get me wrong - I love venison that is cooked to death, especially in chili!

I like to encourage people to eat wild game. In my opinion, hunting is a far more humane way to acquire and eat another animal. It is respectful to the animal, and better for the person consuming it. I must know where my meat comes from, always. It is so important.

Venison is very lean, so it needs tenderizing to break it down and make it melt in your mouth. That is what this marinade does. It not only makes the meat nice and tender, but it give it such a great flavor. It has a very authentic German taste and goes amazing with red cabbage and spaetzle. It is my absolute favorite and I rarely stray from it. In fact, it has been a secret until now. My husband doesn't even know what I put in it. However, I want you all to get out there and not be afraid to try venison steaks. Especially leg steaks and chops. If you can get a tenderloin cut, you are in for a real treat, but to use the rest of the deer, this is for you.

My ingredients

All mixed up

On the grill after 24 hours

Resting

Absolutely perfect


I served my steaks with parmesan-baked zucchini and lemon orzo. Not a speck was left on anybodies plate.

The Perfect Venison Marinade

1 cup apple cider vinegar
1 cup red wine
1/2 cup peanut oil (or other oil)
1 Tbsp. oregano
2 cloves crushed garlic
1 tsp. salt
1 tsp pepper (smoked pepper if you have it)
Water to cover
4 venison leg steaks

* You can adjust this recipe to fit however much venison you are making.

Place venison in a container with a lid. Add all your ingredients and then fill the rest of the way with water. Close the lid and shake, shake, shake!! Let sit in the refrigerator overnight, or even better a whole day. Even better, 2 nights. Take venison right out of marinade and place on your grill and cook for about 8-10 minutes on each side depending on how thick your steaks are. Mine were really thick. You do NOT want to over cook these. You want a little pink in the middle.

"Clean" Chocolate Chip Cookies

For out family's 4th of July celebration, I was to bring a dessert. I debated whether I wanted to bring a healthy dessert or just a good old sweet treat for everybody to enjoy. So I decided to go with both. I had seen a picture for these cute little star cookies where you use strawberries and blueberries to decorate them. Here is the picture I'm referring to:


Great idea, right? Well, let me tell you. First of all, strawberries are not all uniform in size and shape. I had so many issues trying to cut them to get that nice star shape. They were also way too big for my cookie, so I had to trim them. Every single slice. For all the cookies. Waaayyyyy too much trouble. So after I went to all this trouble, they still didn't look great, and I had to figure out how to package them to get them to the party. Clearly, they don't exactly stack. So I came up with this wax paper layering thing that kind of worked, but still wasn't great. So my warning to you is - it isn't as easy as it looks. I could have done a dozen other things with my time than make these cookies. 

Anyway! What I did like was the chocolate chip cookie recipe I came up with to make the base. These are my healthy chocolate chip cookies, and they really hit the spot. I'll definitely make them again, sans decorations. I also made a batch of sugar cookies and did the same thing to bring to the party. 

My ingredients for the chocolate chip cookies are all good for you. They are a perfect dessert for my toddler, especially since they aren't as sweet as most other cookies. They were good topped with cream cheese and fruit, but I liked them just as is. 


I used ground oats and whole wheat pastry flour to get that whole grain goodness but still trying to keep it light  and soft. Also, local honey for the sweetener

Butter. Not a traditional "clean" ingredient but it is in this house. I've said it before and I'll say it again. Once you do your research, you find that butter is indeed a healthy fat. 

I used mini chocolate chips because I thought it would make them easier to cut into shapes once baked, but in the future I will use chunks for sure.

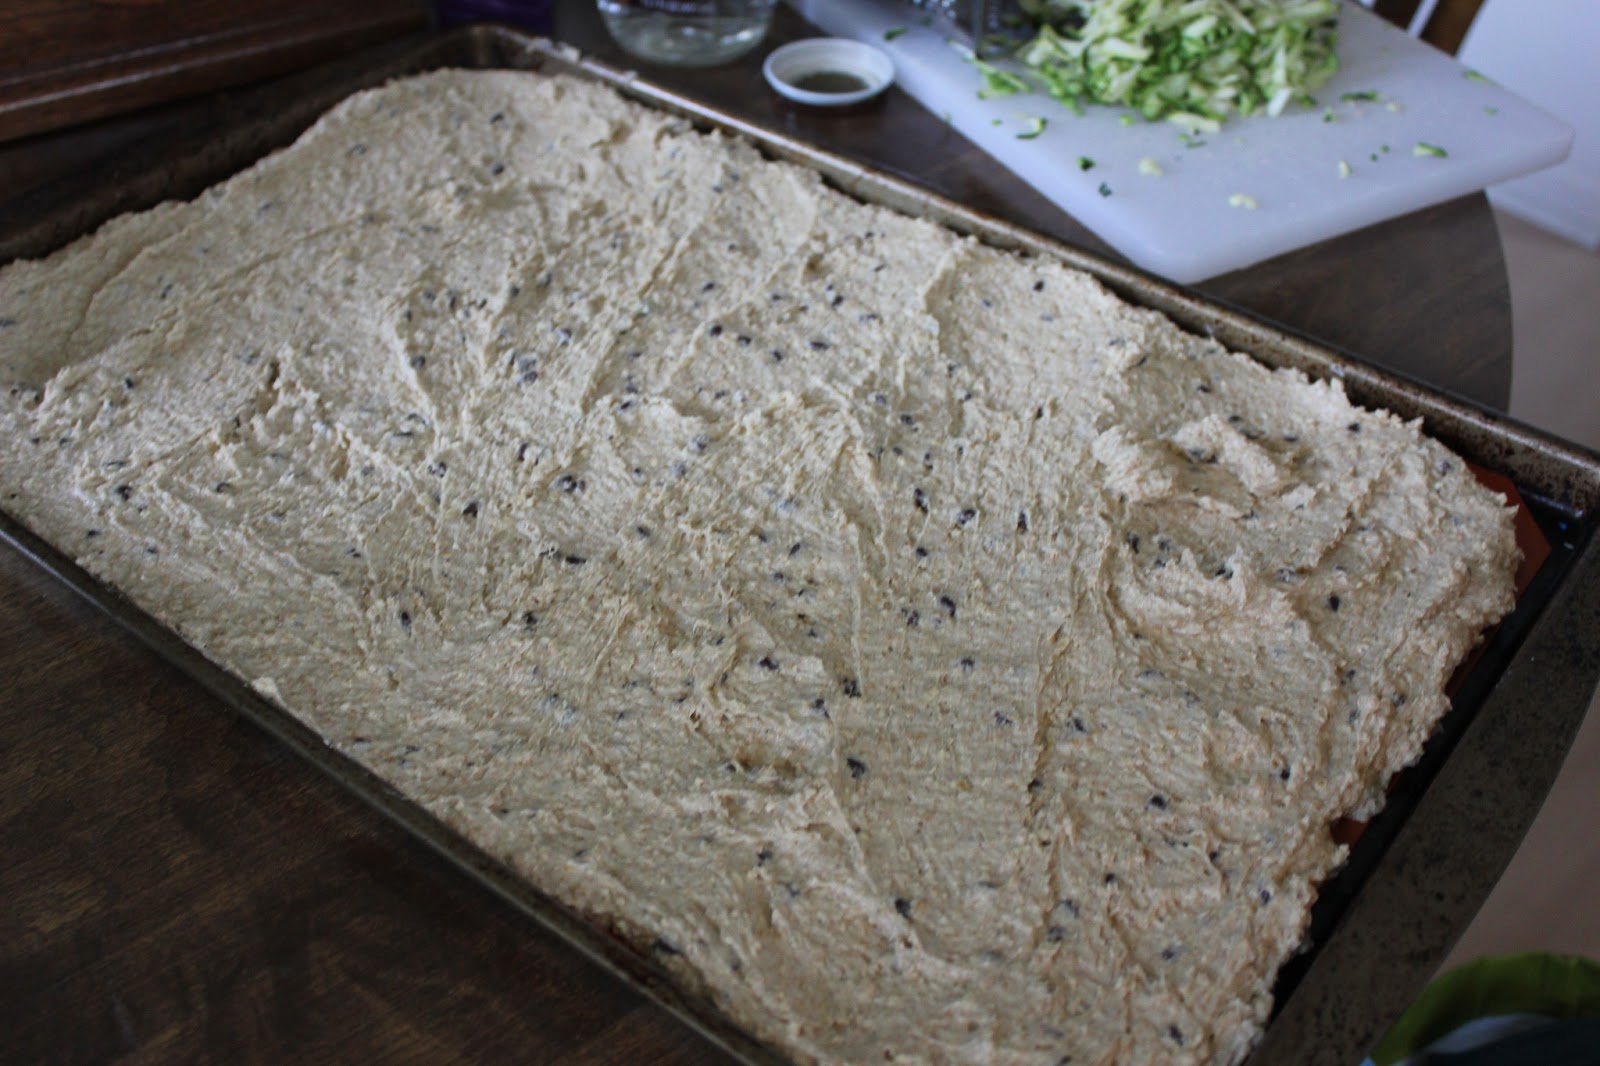
I like to bake cookies in sheet form, so I get doughy-er cookies. 

Here they are baked

The boy loves helping!
I forgot to take pictures of my cut out cookies. I cut them out after they were baked. After all the time I put in making them, I just didn't have time for anything else. That isn't important though. This is a good, healthy recipe for chocolate cookies - I'd even eat them for breakfast!

Chocolate chip cookies

2 sticks butter, softened
3/4 cup honey
1 egg
1 tsp vanilla
1 cup whole wheat flour
1 cup old fashioned oats, ground to a flour in processor
1 tsp baking powder
1 tsp. cornstarch
1 cup mini chocolate chips

Preheat oven to 350. In mixer, blend butter and honey until well combined. Add egg and vanilla. Then add the dry ingredients. Last, blend in the chocolate chips. Spread out on cookie sheet that has either been greased or fitted with a silicone pad. Bake in the oven for about 15 minutes, or until just set (just barely getting some color on the edges. Let cool and cut!


Thursday, June 27, 2013

Homemade Cones for Ice Cream and Double cookie dough Ice Cream

This is a combination of a really healthy homemade un-processed food item and a really indulgent, sinful homemade un-processed food item. I figure they equal each other out. Why don't we start with the super healthy one, and then get on to the good stuff.

I'm guessing my son learned about ice cream cones from TV. One day he came up to me with the bulb syringe he got from the hospital when his little sister was born and was licking the bulb part saying "Ice cream, Mama, ice cream!". Thank goodness it wasn't the one I actually used on his sisters nose. So I thought maybe the time had come to let him have an ice cream cone and spill it all over himself. Then of course I figured it would be a good project for making un-processed. It was kind of hard to find a good recipe - it doesn't seem like something a lot of people pursue to do. I ended up using this recipe from A Groovy Mom. However, I had this coconut sugar that I have been dying to try, and this seemed like as good a time as any. I wanted something kind of healthy for my toddler. So I used it and whole wheat flour. I tried frying them like crepes at first in a pan, and that was kind of a bust. Then I baked them - which was easier, but had its challenges.

You have to form the cone immediately after the flats of batter get out of the oven. They start to harden fast. Well, that makes for some really, really hot fingers. I'm sure they have tools for these things, but I'm not getting that serious about it here. I also found that if I baked them longer they got crispier like a real ice cream cone. If you under bake them they come out kind of floppy.

So in the end, I did get some ice cream cones, but I am not sure they were worth the effort. It is much easier to make a popsicle, or just eat ice cream out of a bowl.

This is the sugar I tried using. They may have turned out better had I used regular sugar, but this stuff seems healthier and tastes great!

It has a dark color to it

The batter is thin like crepe batter

Tying to fry it in some coconut oil - it didn't spread well

So, I did this on a silpat

This is the one I fried made into the cone shape. Not bad - but not really crispy

They cool fast - so you have to form them fast!

Some of my finished cones. 

It is best to use them fresh. It is also a good idea to bake them again like this for 10 minutes or so so they get a little crunchier

If you want these to be more authentic, use white flour and white sugar.

Ice Cream Cones

3 eggs
1 cup sugar (I used coconut sugar)
1 tsp baking powder
2 Tbsp cold water
1 cup flour

Whisk eggs and sugar, and then add the rest of the ingredients. Spread spoonfuls of batter on a silpat or greased baking sheet and bake at 375 degrees for about 8-10 minutes or until turning brown around the edges. Take out and form into cones while still hot. If you can do this without burning your fingers, more power to you. Let set and if desired, bake again for 5 minutes or so to get them to crisp up a bit.

Ok, now on to the good part. Or the bad part. Whichever you chose to decide. The double chocolate chip cookie dough ice cream. You know it is going to be good when it starts with melting butter and brown sugar together, and then adding a bunch of heavy cream.


Then you temper in egg yolks - so you slowly add in the cream mixture to the beaten eggs so as not to curdle the eggs, and then add it all back into the pot to thicken a bit. Then it gets put in the fridge to cool completely.


Meanwhile, I made the cookie dough part. Melted butter, brown sugar, vanilla, flour, and chocolate chips. The batter was a little warm from the melted butter when I added the chocolate chips, so they melted a little bit. Mmmm chocolate cookie dough. I wrapped it up and refrigerated it.


Here is the cream mixture in the ice cream maker. I know you don't need a picture of this really. Isn't is just a sexy sight though?


My Big helper loves watching the ice cream maker. It is better than TV. 
 After the ice cream is churned, I stirred in a bunch of chocolate chips. The mini kind.


Sigh...then I got my cookie dough out of the fridge and chopped it up - and put in in the freezer to harden a bit while the ice cream churned. In my hot kitchen, the ice cream melts fast, so I wanted everything to be cold. 


Stirring it up...

And in goes in those luscious cookie dough bits...


And there you have it. So much goodness in a little container.


After being in the fridge for a while, I scooped it into the cones and gave one to my silly husband. He was pretty excited about the flavor - and the cones were pretty good as well! My son will get one tonight because yesterday when we had these he had already had his ice cream allowance at Prairie Fruits Farm. He wasn't too sad - the chocolate goat milk gelato he had was a real treat!

 Butter, sugar, cream, cookies, chocolate....I'm sorry. And you're welcome.

Double Chocolate Chip Cookie Dough Ice Cream

Recipe found at Pink Parsley

For the cookie dough:
  • 5 Tbs salted butter, melted (or unsalted butter + 1/4 tsp salt)
  • 1/3 cup packed brown sugar
  • 1/4 cup flour
  • 1/2 tsp vanilla extract
  • 3/4 cup chocolate chips (recommended:  mini chips)
For the ice cream:
  • 3 Tbs unsalted butter
  • 2 cups heavy cream
  • 2/3 cup packed brown sugar
  • 4 large egg yolks
  • pinch of kosher salt
  • 2 tsp vanilla extract
  • 1 1/2 cups whole milk
  • 1 cup chocolate chips
To make the cookie dough, stir together the butter and sugar until smooth.  Mix in the flour and vanilla, then fold in the chocolate chips.  Wrap the mixture in plastic wrap, form into a disk, and refrigerate until firm.

To make the ice cream, melt the butter and sugar in a medium saucepan over medium-high heat.  Cook, stirring often, until the butter is a deep golden-brown color, being careful not to burn it.  Whisk in the heavy cream and heat until simmering.

Meanwhile, whisk egg yolks until light and fluffy in a medium bowl.  Add a small amount of the cream mixture to the eggs, whisking constantly.  Whisk in the rest of the cream slowly.  Return the mixture to the saucepan, and cook over medium heat, stirring often, until it has thickened slightly and reads 170-175 degrees on an instant-read thermometer.

Remove from heat and pour through a fine-mesh sieve into a medium bowl.  Mix in the vanilla, salt, and whole milk.  Cover with plastic wrap and chill until very cold.

Churn ice cream according to manufacturer's instructions.  As it churns, remove the cookie dough from the refrigerator and cut into small pieces.  Pour the ice cream into an airtight container and mix in the chocolate chips and the cookie dough.  Freeze until firm.

Wednesday, June 26, 2013

Chocolate "Brownies"

Alright, I'll be frank - these are not brownies. The original recipe I used said they were brownies, but they are totally not brownies. I got the recipe here from Living Nutrition. They are paleo, vegan, refined-sugar free, and full of heart healthy fats and fiber. They are also raw. I am none of these things. I refuse to label myself by any certain food group. What attracted me to these...bars, we'll call them...are the ingredients and the fact that they just looked really yummy! First, they are very un-processed. They use minimal ingredients, and good clean ingredients. They also pose a great opportunity for getting good things into my toddler with the lure of chocolate and gooey-ness.

These bars would have been easy if I had a better food processor. As it is, my processor really got a workout and I ended up having to put in a little elbow grease and extra dishes. So if you are going to make these - make sure your food processor is in excellent condition. They still came out super good, but making them again is questionable just because I don't think my processor could handle it again. It is almost dead as it is.

The ingredients for the bars are pure and simple - walnuts, dates, coca, and a little sea salt. The original recipe also called for stevia but I just skipped that. Even though it is an all-natural sweetener, I think it gives things a kind of funny taste. Plus, a lot of things are natural, like alcohol and marijuana - that doesn't mean they should be consumed by my children in high concentrations. (I am totally for the legalization of marijuana by the way - but that is a topic for another time). Dates are pretty sweet, in my opinion, and I really don't think these need to be any sweeter. I would probably add honey if I really thought they weren't sweet enough. They kind of remind me of those lara bars or raw food bars you find at health food stores. I love those, so I knew no matter what I'd love these. the frosting has good ingredients as well: cocoa, maple syrup, coconut oil, and vanilla.

This was my food processor trying so hard to grind up the walnuts and dates. I ended up moving them to another bowl and tried it in batches, but my processor was done. It had enough. So I had some chunks of dates in my bars. We are living with it.

 The mixture pressed into a pan with waxed paper to help with removal.


And the frosting added. It gives it a brownie look and effect for sure. They still aren't brownies.


The true test - success! Love getting good things into this kid in a fun way!


They do resemble brownies, I guess. You can tell they are made with fruit and nuts though. Brownies have butter and are baked. The bottom line is, these are good - really good. And filling!! They are really packed with fiber and nutrients. I love that.


Being that it is the middle of summer - it is hot. My coconut oil is no longer solid at room temp, because room temp is about 76-80 degrees in my kitchen. So these need to be kept in the refridgerator so that the frosting doesn't melt all over the place. They are better cold anyway!

Chocolate Ooey-gooey Fruit and Nut Bars

4 cups whole walnuts
1 1/2 cups cocoa powder
1/2 tsp sea salt
12 oz dates - fresh are best but dried are OK too, just use a little less and maybe add a little water

Process the walnuts in a food processor that likes a challenge. Add the cocoa powder and blend until combined. Add in the salt, and then the dates a little at a time. You should feed them in slowly. Press this mixture into an 8 x 8 or 9 x 9 baking dish lined with waxed paper.

Frosting:

1/2 cup cocoa powder
1/2 cup maple strup
1/4 cup coconut oil
1 tsp. vanilla

Melt coconut oil in a pan and add the rest of the ingredients. Blend well, and pour on top of brownies. Refrigerate until set. Cut into brownies about a square inch in size. They are dense :).


Wednesday, June 19, 2013

Homemade Chocolate

After a couple weeks of vacation at our lake house in Minnesota, I am finally starting to get back into the groove of things here in Illinois. We have been working on the garden, letting the chickens roam, and making new stocks of bread, crackers, ice cream, and other necessities that I have already blogged about. So now it is time for something new!

Summer has always had a feeling of fun to it - as children it is a break from the grind and a chance to be care-free. I have memories of long afternoons at the pool, eating popcorn and ice cream for lunch, and riding my bike to and from friend's houses where we did the same exact things. Well, I've gotten the pool passes, aired up the bikes and the bike trailer, and made plenty of ice cream. I have also made pure, homemade chocolate bars to make the summer even sweeter. These chocolate bars are rich, dark, and not too sweet. Actually, I may dare say they are....healthy.

There are 3 simple ingredients. Cocoa butter, cocoa powder, and honey. Compare that to a Hershey bar and you'll see why I decided to make my own. They are equally as simple to make, and they are the perfect after-dinner morsel. For some reason one little piece of this lasts me longer than a whole store-bought chocolate bar. I think it is the richness combined with wanting to make it last - I wanted to savor every bite.

This is cocoa butter. I bought it off Amazon like I do everything. It smelled amazing  right out of the box. It is a heart-healthy fat, shown to raise HDL cholesterol. 

I melted it in a pot

You are supposed to mix equal parts cocoa butter and cocoa powder by weight, so I used my food scale to measure. 

Cocoa powder in

All mixed up with just 1/4 cup of honey added. I eye-balled it. 

My favorite part

Not so patient - his little finger got right in the bowl. I used a pie plate lined with parchment to set it, but may just use a cookie sheet next time for thinner pieces
Taa daa!!
This chocolate is kind of soft, which I prefer to chocolate that cracks when you bite it. It set in the refrigerator overnight. We enjoyed this for weeks.

Homemade Perfect Chocolate

8 oz cocoa butter
8 oz cocoa powder
1/4 cup honey
1/4 tsp salt (optional, but highly recommended)

Melt cocoa butter in large saucepan. Add in cocoa powder and salt, and when completely combined add honey. If you like sweeter chocolate, add a little more - but it really doesn't need it in my opinion. Pour into a parchment-lined cookie sheet, cake pan, or whatever else you might have. I even put some in some silicone cupcake thingies for fun. Set in fridge for 6 or more hours. Cut into pieces and enjoy!!