Pages

Monday, September 30, 2013

Fresh Tomato and Herb Marinara Sauce (and fresh ricotta)

I don't think I've ever made marinara sauce the same way twice. It all has to do with what I have on hand, if I want a meat sauce, what spices I want in there, etc. This comes about as close to my "original" marinara sauce. It uses fresh tomatoes, basil, and parsley. I think the fresh herbs really makes this superb, but I'll admit I usually use dry herbs for my sauces.

I had a bunch of tomatoes to use up and was deciding between jarring salsa or marinara sauce, and in the end it came down to the fact that I also have tons of fresh basil and the fact that we just use marinara sauce all the time - be it for pasta, chicken, veggies, etc. I got 3 pints of this sauce in jars and used the rest to make a yummy pasta dish for lunch.

I started by peeling the tomatoes using the boil method - just boiling them until you see a crack in the skin and then plunging them in cold water to stop the cooking. Then you can easily take the peel off the tomato. If you try to jar the skins of the tomatoes, they will usually get kind of tough and not very palatable as the jars sit.

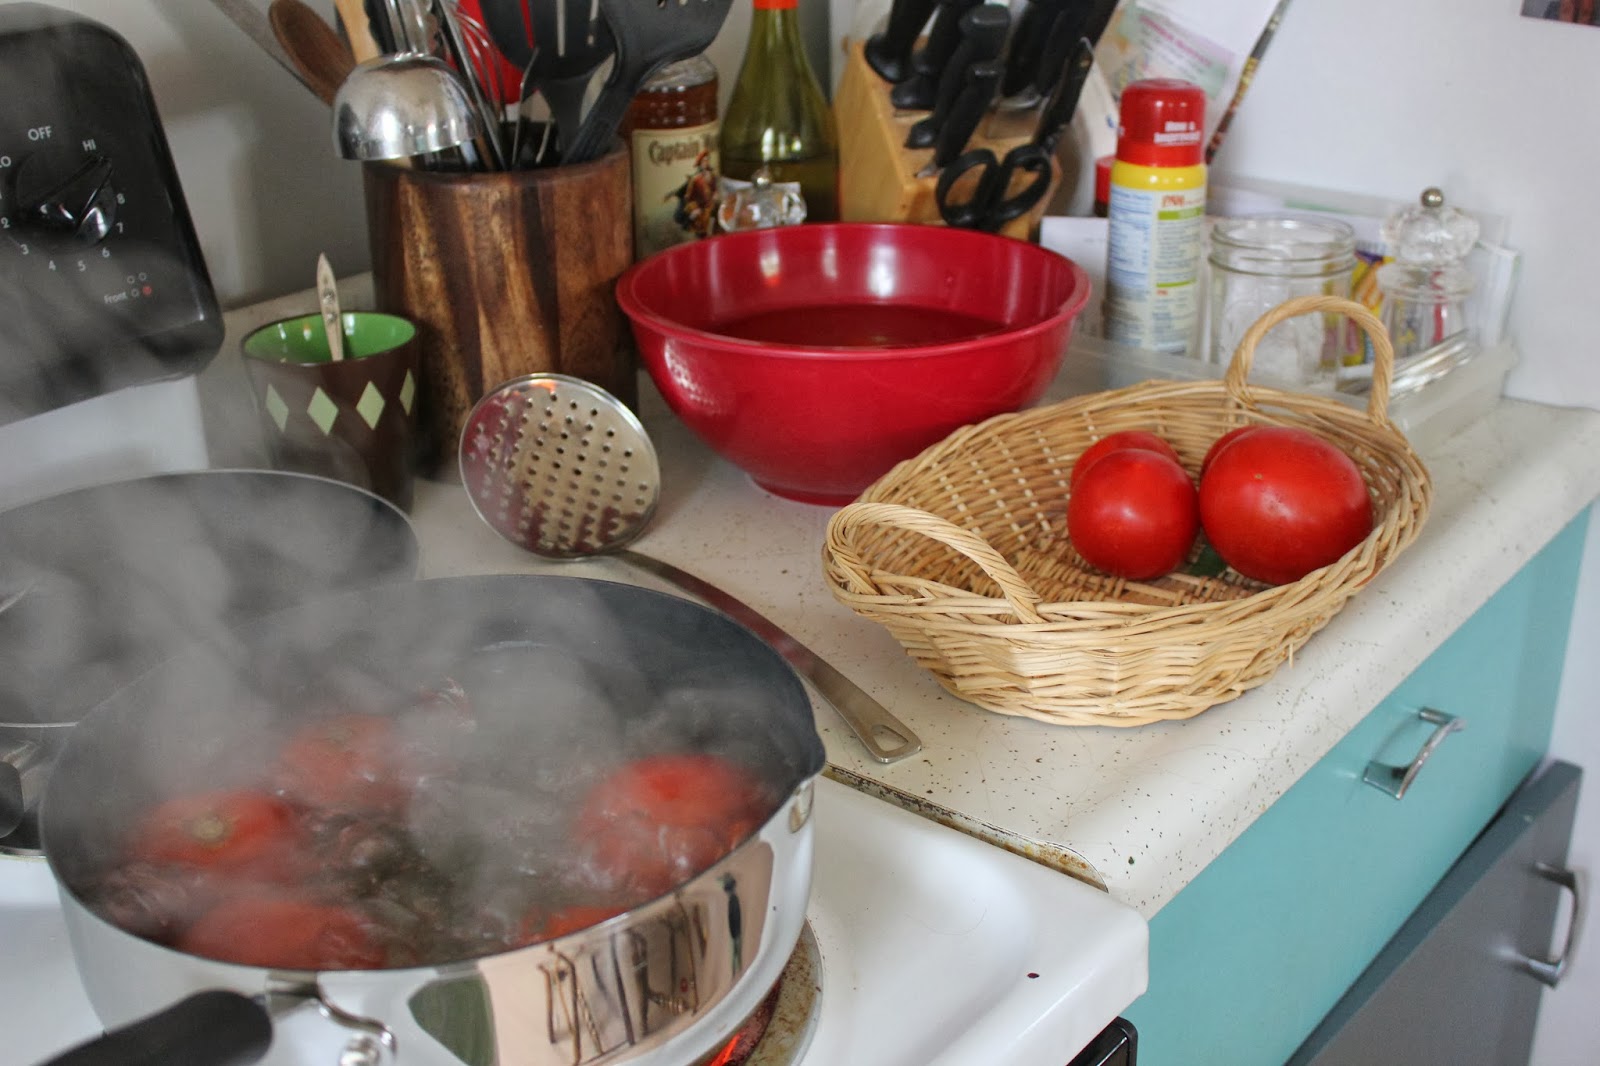
My tomato peeling set up 

Then to make the sauce I start with onions. I used both red and yellow onions in this, just because I had them and I think the red onions add a little sweetness. I sauteed them in some extra virgin olive oil until they were pretty soft. Then I added an ingredient that most people might not have in their homes, but I do, and it seemed the perfect fit. Baby food carrots. I usually add some carrots to my marinara to add some sweetness without adding sugar, and the fact that these were already pureed and my baby girl doesn't eat them it just worked out perfect! If I had fresh carrots, I would have used them, but this is perfect for a little sweet to off set the acid in the tomatoes and get more veggies in!

Red and yellow onions

Yup

The I added some red wine. Always always always add red wine to your red sauce. It gives it such good flavor and depth. I also added in some dried oregano at this point because I didn't have that fresh.

The carrots in the pot
 Then I add in the tomatoes. I add them whole, so that I won't lose a bunch of juice trying to cut them up. once they are in the pot I can mash them with a potato masher or just poke at them with my spoon, which is what I did here.


I then chopped and added my fresh herbs - basil and parsley. I ended up with almost a cup of chopped basil and half a cup of parsley. 


Then I added a bit of salt and pepper, and let it all boil together for a few minutes. Since I don't seed my tomatoes, the sauce can be kind of thin, so letting it reduce a little really helps.

Then into my hot, sanitized pint jars it went. I made sure to make the biggest mess possible, because it isn't good food unless there is a mess involved. I processed the jars for about 10 minutes.

Canned up

Boiling, then ready for a busy day!

Now, let me tell you about my new discovery. Homemade ricotta cheese. Now, this isn't real ricotta. Real ricotta comes from a second boiling of whey after making some other cheese. This is a quick, easy shortcut though, and beats any ricotta I've gotten at the store. Plus, I can chose the milk it comes from, and know everything that is going into it in my own kitchen.

You just start with 8 cups of milk, 2 teaspoons of salt, and heat it to 180 degrees, much like with yogurt. Then you remove it from the heat and add 3 tablespoons of lemon juice and 3 tablespoons of regular vinegar. You let it sit for 10 minutes, undisturbed, and then strain it all through a strainer lined with cheesecloth. I let mine sit for about half an hour - the longer it sits, the drier the ricotta will be.


 After making it, I put some in the fridge for later plans, but I also added about 1/3 cup to the rest of my sauce.


Mmm creamy goodness
Which resulted in this super delicious and nutritious sauce for some pasta I made for lunch!

Kid approved!


He is saying "pasta!"

They both asked for thirds!

Seriously, she is so darn cute. 


Yaya for fresh pasta sauce!

Fresh Tomato and Herb Marinara Sauce

9-10 medium sized tomatoes
1 tablespoon extra virgin olive oil
1 whole, large onion (red, yellow, or a combo)
red wine
1 jar baby food carrots, or one carrot finely chopped
1 tsp. oregano
1/2 cup fresh, chopped parsley
1 cup fresh, chopped basil
1 tsp salt
1/2 tsp. pepper

Skin the tomatoes and set them aside. In a large sauce pan add olive oil and saute chopped onions for about 10 minutes or until soft. Add wine and carrots, then add oregano. Add your tomatoes and mash them up a bit with your spoon or with a potato masher. Let this reduce a bit until it is slightly thicker. Add in your fresh herbs, salt, and pepper, and let it boil another 5-10 minutes or so. 

You can jar about 3 pints with about 1 1/2 cups left over for a fresh meal. 

Vanilla Rum Apple Butter

We don't have apple trees, but we have friends that have apple trees, and there seems to be an excess of apples this year. We sure don't mind taking the overflow off their hands! Apples are one of my favorite foods - whether fresh and crisp for a snack or baked in a pie or in this case, made into a luscious, healthy spread for toast, crackers, or whatever. It is especially good on biscuits, or on a bagel with cream cheese!

What I really like about making apple butter is:

1. You don't have to peel the apples
2. You just throw everything in the crock pot and let it do its thing
3. It has rum in it
4. It uses a lot of apples!

This stuff packs a big nutritional punch in a small serving, and it is so darn tasty. I'm glad I was able to jar some of it because I know I'll want more and more as the season goes on and the apples aren't so plentiful anymore.

My apples were all different sizes, and I used Granny Smith because that is what I was given. I just cored them and chopped them into big pieces and filled my crock pot with them. I'd say I used a good 10 apples. Then I added about a cup of apple cider (from our local orchard) and maybe a half cup of spiced rum. I just splashed this stuff in there, so it doesn't have to be perfect. I set it on low. I also threw in 3 vanilla bean pods, and after the first hour I took them out, seeded them, and added the vanilla seeds to the apples. I did it this way because I wanted the steam to soften the pods before I cut them open. I get my vanilla pods off amazon, but you can also use vanilla paste or just vanilla extract. I really like the seeds though.

Then it just sits for about 8 hours! It cooks down, and makes your house smell ridiculously good.

Then you have to tilt the lid on the crock pot, and cook it for another 5-6 hours on low or until it is getting to be a thick paste. Then you can go at it with either an immersion blender, or put it in a food processor to grind it all up and make it smooth. I used my immersion blender. 


After cooking for just a few hours

After cooking 8 hours!

Pureed and ready for eating, or canning

Little jars of goodness


I then canned all but about a cup - and got 6 - 4oz jars. They will also make great gifts this holiday season :).


The rest was spread on baguettes and crackers, and I still have some left in our fridge for snacking. Sometimes, I just go in the fridge with a spoon and have a nice taste of fall.

Vanilla Rum Apple Butter

About 10 apples - enough to almost fill a crock pot after being cored and made into hunks
1 cup of apple cider
1/2 cup of spiced rum
3-4 vanilla pods, or vanilla paste, or vanilla extract (I'd say 2 teaspoons)

Core apples and hunk them up and put them into your crock pot. Add cider, rum, and vanilla pods. If your vanilla pods are already pretty supple you can slice them open and get the "caviar" out and add it to the apples. If they are kind of dry like mine let them steam in the crock pot for an hour or so before doing this. Alternately, add about a tablespoon of vanilla paste, or a couple teaspoons of vanilla extract.

Turn the slow cooker to low and cook for 8 hours. Then tilt the lid so steam can escape and cook for another 5 hours or so on low. Puree the apples with an immersion blender or food processor and either enjoy fresh or can for later!

 If canning, spoon the hot apple butter into jars that have been prepped (either boiled or put through the dishwasher to sanitize), place the hot lids on and process in a hot water bath for 10 minutes. Take out and let cool.

Enjoy!

Friday, September 20, 2013

Peach fruit leather

I have no trouble getting my kids to eat fruit. If it were up to my son, all he would eat is fruit. I buy so much fruit and generally it is all eaten up, but sometimes I end up with fruit that just doesn't last the week before I go to the store again. Dehydrating fruit really works well for us because it lasts longer, so we can eat lots of fresh fruit the days following my trip to the store, and then later in the week we can start eating the fruit products that last a little longer and don't attract fruit flies. So we eat a lot of raisins, dried cranberries, dried apples, etc. Fruit leather puts an interesting new spin on dried fruit. 

While I do love my dehydrator, it wouldn't work for fruit leather. You need a flat surface where you can make a nice, even layer. It has to sit in a low-temp oven for 3-4 hours. So do this on a cool day when you don't mind your oven being on for a while. 

When I first cut these up I thought they were a little too tough for toddlers, but they softened a bit over time and the kids were able to eat them just fine. The original recipe said to add some honey, but I didn't. Not because I didn't want to - I just forgot. They are plenty sweet though!

I started with 4 ripe peaches and blended them up in my new awesome food processor. You could also use a blender for this - you might just have to push the fruit down to get it going. 


Then I put some parchment on my cookie sheet and spread the mixture in as smooth and equal a layer as possible. 


Then into the oven it went for 4 hours. After the 4 hours, I just let it sit in the oven over night. The next day I used a cookie cutter to cut it into strips and rolled them up to make them nice and portable.


So there is another way to eat a peach - and make them last a little longer!

Peach Leather

4 ripe peaches
1 T honey (optional)

Process peaches until pureed. Set oven to 225 degrees Fahrenheit and line a cookie sheet with parchment paper. Spread the puree in one layer over the parchment. Set in oven for 3 hours or until not sticky anymore. Let sit over night before cutting into desired shapes. Enjoy!


Thursday, September 19, 2013

Wheat germ and parmesan crackers

Yes, another cracker recipe....but this one is my favorite yet! It is pretty basic but the cheese makes it so flavorful. I used parmesan in one batch and some Moonglot goat cheese from Prairie Fruits Farm for another batch. Both were so good. I think as long as you use a hard grating cheese you really can't go wrong. 

These are great on their own, or served with some hummus or other dip. Yet another cracker to add to our routine!

I got the recipe from Weelicious. I really want that woman's cookbook for Christmas this year! She has some awesome and healthy ideas for kids!

Also, take note that I have a NEW food processor. The kitchenaid 13 cup processor with 3 blades, a 4 cup mini dish, and lots of other bells and whistles. I've been having so much fun with this thing. 


Wheat germ, flour, and cheese in the food processor. 

In goes the butter

Adding the water

All clumped so it is ready to go!

The cheese I used in this batch

You can kind of see how it clumps up....you don't want to add any more water after this. 

Rolled out and cut with a pizza cutter


Baked! I had to try a few pieces to make sure they were done...


These get nice and crispy like a cracker should too. They were a big hit with the kiddos!

Wheat germ parmesan crackers

3/4 cup wheat germ
3/4 cup whole wheat flour
1/2 cup parmesan cheese, or other hard grated cheese (packed)
1 tsp salt
1/2 stick butter, cut into cubes 
1/4 cup cold water

Preheat oven to 350. Blend wheat germ, flour, cheese, and salt in food processor. Add in the butter and pulse until incorporated and crumbly. Slowly add the water until it all comes together in a ball. You can now roll the dough out right on your sil-pad, or roll and cut into shapes and transfer them on there. However much work you want to do. Bake for 15-20 minutes or until the outside edges are slightly brown and crispy. 

Saturday, September 14, 2013

Blueberry Frozen Yogurt Sandwiches

These cold treats may not make much sense now that the weather is a bit more seasonal, which is a very welcome change around here, but they are still a yummy treat. Besides, ice cream and frozen yogurt is good any time of year! When I did make these, it was 99 degrees out and I wanted something cold, healthy, and sweet. I didn't have any cream, but I did have my homemade yogurt and a bunch of blueberries from our aunt and uncle's place. So I decided to make these frozen yogurt sandwiches from The Galley Gourmet. I substituted maple syrup for the sugar in the blueberries, and used my homemade yogurt to make frozen yogurt in my ice cream maker. My bars aren't very sweet, so if you prefer more sweetness either add more honey/sugar to your yogurt or use a good brand of vanilla frozen yogurt. The cookies lend a nice sweetness to the whole thing though!

I started with the blueberries - I had probably 3-4 cups. After they were thawed and started to cook down I mashed them with my favorite potato masher. Let me tell you something about this masher - it has been around forever, traveled, and is still my favorite after several other mashers.


Then after it was nice and mashed I added about 1/4 cup maple syrup mixed with 1/4 cup cornstarch.


While that cooked I got started on the cookie part. Butter and brown sugar were creamed, then an egg and some vanilla. Then whole wheat flour, baking soda. baking powder, salt. and cinnamon. 


Mt taste tester...


I buttered and floured two pans of the same size and distributed the dough. Next time I'll put parchment in the pans as well, because my top layer of cookie kind of meshed with the butter/flour mixture and stuck to the pan.


Here they are baked up


Then the layering! Half the blueberry mixture...


The frozen yogurt...


And dolloped the other half of the blueberries. It was so hot my fro-yo was melting like crazy, so it got a little icy in the freezer, but not too bad.


Then I topped with the other cookie crust, needing some repair work...


But the results were delicious and still beautiful!


Mmmmm


Having some of these in your freezer, possibly  individually wrapped, can't be a bad idea!

Blueberry and frozen yogurt sandwiches

For the Sandwich Layers
1 cup whole wheat flour
1/2 teaspoon baking powder
1/4 teaspoon baking soda
1/4 teaspoon kosher salt
1/8 teaspoon ground cinnamon
4 ounces (8 tablespoons) unsalted butter, softened
3/4 cup packed light brown sugar
1 extra large egg
1/2 teaspoon pure vanilla extract


Preheat the oven to 375ยบ F with the rack in the middle.   Butter and flour two 8-inch baking pans, then line with parchment paper with sides over hanging for easy release. In a medium bowl, whisk together the flour, baking powder, baking soda, salt, and cinnamon; set aside.  In the bowl of a stand mixer fitted with the paddle attachment, cream the butter and brown sugar at medium-high speed until light and fluffy, about 3 minutes.  Beat in the egg and vanilla.  Reduce the speed and add the flour mixture in two batches, mixing just until combined.  Evenly divide the batter between the prepared pans, spreading with an offset spatula.  Bake until golden brown, but still tender, 10-12 minutes.  Cool completely in the pans for least 1 hour.

For the berry layer:

Heat and mash 3-4 cups of fresh or frozen blueberries until cooked down. Add 1/4 cup maple syrup mixed with 1/4 cup cornstarch and stir until thickened. Let cool. 

You can find my homemade yogurt recipe here, and turn it in an ice cream maker, or use store bought fro-yo. 

To assemble:

Spread half the berry mixture onto one cookie layer. Top with the fro-yo, and dollop the remaining blueberry sauce over that. Carefully invert your second cookie layer on top of that and press down as hard as you can without breaking the cookie layer. Freeze for 24 hours, or as long as you can stand waiting. At least 8, I recommend!

Plop the whole thing out on a cutting board and cut into desired sizes. Keep well sealing in the freezer for easy grab-and-go snacking!